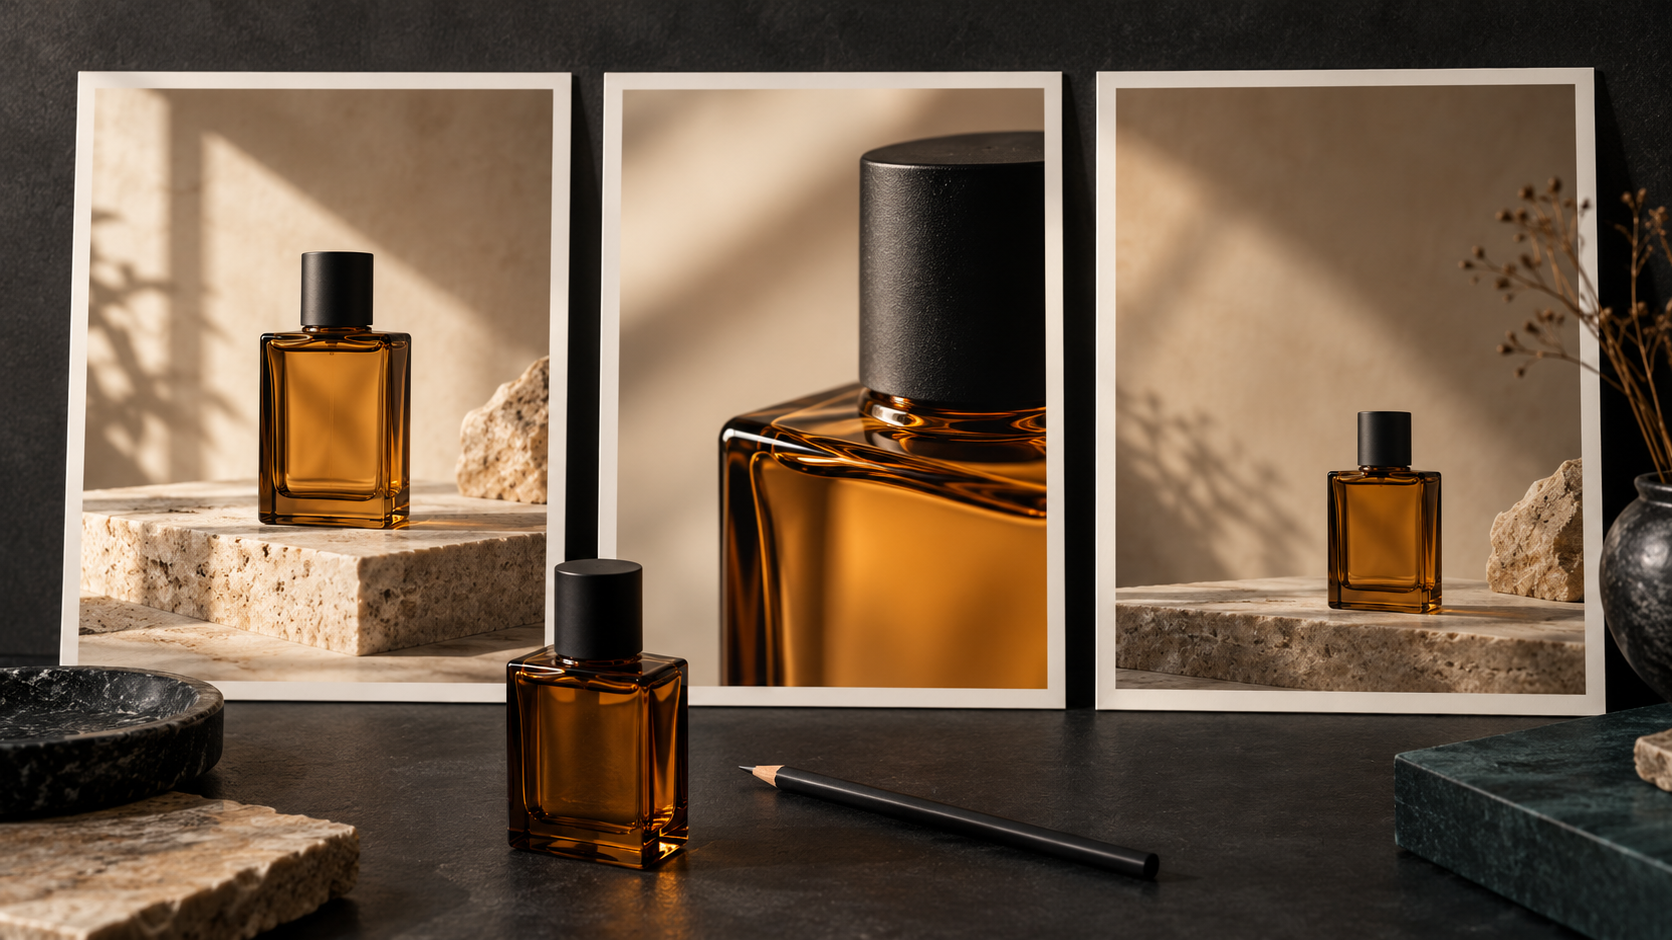
Give each shot one job: introduce the product, show a defining detail, and leave viewers with a clear final frame. Approve the still images before generating motion, then assemble the usable moments in an editor.
A product video needs a sequence viewers can follow. A dramatic opening is less useful if the bottle changes shape in the next shot, or if the ending cuts away before the product is recognizable. A small storyboard helps you make those decisions before spending time generating clips.
This guide plans a roughly 12-second edit for a fictional, unbranded amber perfume bottle. The timings are editorial targets for the finished sequence, not promises that a generator will obey timestamps or offer those exact clip lengths. Generate separate shots, inspect them, and trim the usable portions in a video editor.
1. Write the product brief before the prompts
Choose one message the pictures can communicate: for this example, warm glass and a simple sculptural silhouette. Avoid asking the video to demonstrate a benefit you cannot show or verify. Write down the product features that must remain fixed across every frame, and use an accurate product reference when the selected tool supports one.
- Product: a rectangular amber glass bottle, a short neck, and a matte black cylindrical cap. No printed label in this fictional example.
- Setting: pale stone surface, charcoal background, and soft window light from frame left.
- Visual continuity: consistent bottle proportions, cap height, amber tone, and direction of the shadow.
- Delivery: a vertical composition with space for a short title added during editing. Keep the whole bottle comfortably inside the intended crop.
For a real item, replace the fictional description with the actual packaging. Check the reference for distorted edges, glare hiding important details, or a cropped cap. A generated approximation is not a reliable substitute for an accurate product photograph when a buyer needs to judge the exact item.
2. Give three shots three different jobs
| Edit target | Shot and purpose | Starting image | Motion plan |
|---|---|---|---|
| 0–4 seconds | Introduce: make the entire product easy to recognize. | Full bottle and cap visible on pale stone; uncluttered background. | One gentle push-in; bottle stays still. |
| 4–8 seconds | Detail: direct attention to the glass shoulder and cap. | A closer approved view of the same product, with matching side light. | A small lateral camera move; keep important edges visible. |
| 8–12 seconds | Close: leave a clear, readable product impression. | Wider hero frame with breathing room for an added title. | Locked camera; a brief calm hold before the edit ends. |
Sketch these frames on paper or make a simple contact sheet. Judge the sequence at thumbnail size: can you tell which image introduces the item, which isolates a detail, and which gives the ending space? If all three frames look nearly identical, change the framing before generating motion.
3. Approve the stills, then write motion prompts
In Runway's official image-to-video guidance, the input image supplies the starting composition, subject, lighting, and style; the prompt describes movement and progression. Its text-to-video guidance also calls for describing the visual scene. Apply that distinction only where your selected tool supports the corresponding mode. Check its current controls rather than assuming every model handles references the same way.
Prepare and approve one starting image per shot. Match the bottle geometry and light direction before animating. Then use a short motion brief for each image-to-video shot. The following are original, untested planning examples; they are not documented Yanora results.
The camera makes a slow, gentle push toward the bottle. The bottle remains upright and still on the stone surface. Soft side lighting stays consistent. The shot settles on a clear full-product view.
The camera makes a short, slow lateral move across the bottle's shoulder and cap. The bottle stays fixed on the surface. Reflections shift gently with the camera, keeping the glass edge and cap readable.
Locked camera. The bottle remains upright and still. Soft window light stays steady. The composition holds calmly with clear space beside the product for a title added later.
For text-to-video, add the approved product, setting, lighting, and framing descriptions from the brief. Do not ask one prompt to introduce the bottle, remove its cap, spray perfume, transform the room, and finish with a new angle. Those are separate creative and continuity problems. Start with the simplest action that serves the shot.
4. Generate and revise one shot at a time
- Choose a supported output size and duration in the current tool. Leave enough usable footage around each intended cut; trim to your storyboard timing later.
- Generate the establishing shot first and compare it with the approved product reference. Check the cap, shoulders, base, and contact shadow.
- For a failed detail shot, identify one problem before revising: too much camera travel, a hidden edge, or changing geometry. Simplify that one element and keep a record of the revision.
- Save the accepted clip and its input image, prompt, settings, and intended place in the sequence. Continue only after you know which version you plan to edit.
5. Assemble the sequence and check the joins
Trim to the clearest moments rather than stretching a flawed clip to fill the target duration. Use simple cuts while assessing continuity. Pause on the frame before and after each cut: the scale can change deliberately, but the packaging should still look like the same item. If a close-up invents a different cap, replace it instead of hiding the change behind a transition.
Add final typography and exact logos in your editor, where you can control placement and spelling. Keep titles clear of the bottle and inspect the final vertical crop. Decide on sound separately: use appropriate recorded or generated audio where supported, and review its timing in the finished edit. A motion prompt alone does not establish audio support.
Review checklist before export
- Recognition: the opening shows enough of the product to identify it.
- Continuity: silhouette, cap, color, and surface placement agree across shots.
- Motion: every movement has a purpose; the product stays physically grounded.
- Cuts: joins feel intentional, with no unwanted shape change or abrupt lighting jump.
- Ending: the last frame holds long enough for the product and title to be read.
- Delivery: text is accurate, the crop is clean, and any audio has been checked in the exported file.
Put the storyboard to work
Yanora's Create page currently offers Create Image and Create Video entry points. Start there to inspect the available tool's current inputs, then use your approved brief and shot list to guide the creation process. Plan to assemble and finish the sequence in a video editor; this guide does not assume an automatic three-shot editing feature.
For the next step, the related photo-to-video guide explains how to approach an individual still, while the camera-movement guide helps you choose between a pan, a tracking shot, and a push-in. Keep the storyboard beside you as you work: each generated clip should earn its place by doing the job assigned to that shot.
Sources & further reading
Primary documentation behind the model-specific guidance:
- Runway: Image to Video Prompting Guide ↗
- Runway: Text to Video Prompting Guide ↗
- Yanora: Create AI Images & Videos — checked October 17, 2026 ↗
Put your creative brief to work.
Explore the current tools and inspiration on Yanora.
Explore Yanora